Archive | How To RSS feed for this section

Hiatus

27 Jun

I recently took a blogging hiatus because I felt a bit overwhelmed with a new job and preparing for grad school in the fall. As I began to get settled in the job, one week of not positing turned into three, then months. Although I was still doing my nails, I was too into my routine to take the time to blog about it. I recently remembered that my passion for nail art was deeper than just blogging; the entire process (selecting a color that matched my mood, doing my nails, writing about it, and then sharing it) was my way of taking time to stop and focus on me. Last night I decided to stop depriving myself of personal time and happiness, and did my nails first thing this morning.

I’m pretty darn proud of my work! The base polish I used was 2 coats of Sally Hansen’s Hard As Nails: Celeb City and the top color I used Sinful Colours’ Rise and Shine. Turquoise is my favorite color, so I decided to use it as a new beginning with the blog. For the designs, I used nail tape. As an fyi, when using nail tape, make sure you remove the tape before the polish dries to ensure perfect lines. I went a little design happy, but that’s what nail art is all about right? What polish tricks do you use?
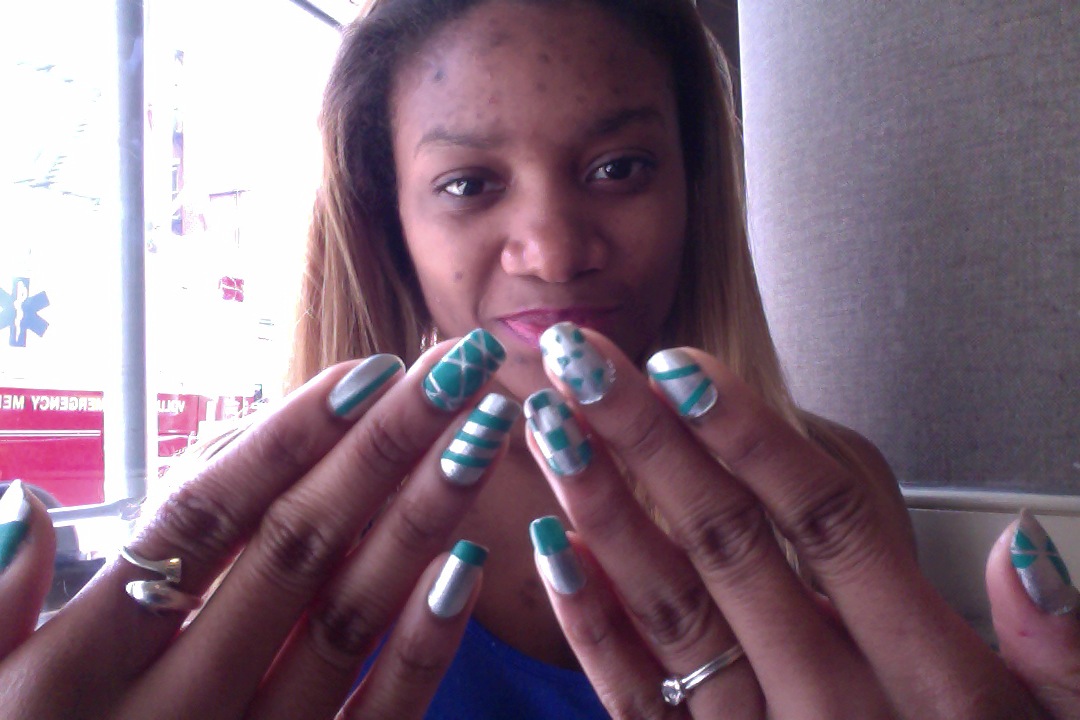
Nail Happy!

Design Happy!


I hope you enjoy! Happy polishing!

NE

I’m Back With a Vengeance!

25 Aug

Something I like to call “painter’s pallet”. I think this is going to be my end of summer tradition.

1. 2 coats of white polish
2. Dab blue polish using q-tip
3. Then yellow
4. Then pink
5. Seal with clear polish

I used blue first bc it was the only one that wasn’t a neon polish. Try to avoid using too much of each color bc it’ll muddy up the polish.

One of my favorite #manicures to do. #nailenthusiast #polish #nails #nailpolish

20130825-083250.jpg

Glitter – No Not The Movie

27 Aug

It’s #ManicureMonday!!

Yesterday I attemped (and failed) to try the Blow Dry Manicure design and the Mermaid Manicure. They both didnt work out for different reasons. I don’t have polish thinner for the BDM. I tried using alcohol instead. Yea no, didn’t work the way it was supposed to. The net for the Mermaid Manicure kept moving. I needed three hands. I’m not giving up on these two. I’ll go back to them when I have everything i need to complete them successfully.

This week, instead of using regular nail polish color, I used glitter! I know there are many polishes out there that have glitter in them (my mini top coat now being one of them lol), however, I feel like those polishes never have enough glitz. I wanted my nails to be all glitter and no nail.

Here’s what I did:

  • Use a base coat for the glitter to stick to – I used a frosty pink that looks transparent when applied to the nail
  • Use a sponge to pick up the glitter – I used a sponge paint brush
  • Tap the glitter onto the wet nail(s) – I did two nails at a time
  • Apply multiple coats of your top coat – I probably over did the top coats but hey, the glitter sticked
  • Add color for accent if you feel – I liked the bare silver glitter after the glitter got off of my fingers.

Here’s what it looks like right after:

I totally could go without the blue accent, but the glitter gets everywhere lol

Here it is cleaned up:

Enjoy the rest of your #ManicureMonday!!

xx Coy

#DIY: Water Marble Swirl

19 Aug

Today I tried something new – Water Marble Swirl (Black & White).

I recently Pinned this on my “Gotta Try This” board and was very excited to do so this morning.

Enjoy!

Here’s what I used:

  • Small plant pot full of room temperature water.
  • Q-Tips
  • Nail Polish (obvi) – Choose whatever colors you want to use (2-5)
  • Tape
  • Nail Polish Remover
  • Marble tool (optional)

Water Marble Swirl

Water Marble Swirl

My Thoughts: I’m very proud of myself for doing this! It’s messy and tedious but so much fun. I practiced a few times before doing it for real. I ended up not liking the way 2 of the nails came out so I decided to just make them my “accent” nails. When I’m feeling funky and creative, this will be my go to design (different colors of course).

Notes:

  • Try to drop the polish in the water as fast as possible. The polish will start to dry as you continue to add drops, so the faster the better.
  • Take breaks between doing hands because you’ll run the risk of messing up and having to do things all over again.
  • When your finger in is the water, gently blow on the water so the polish dries around it.
  • Make sure when you dip your finger in the water, the nail is facing the design/water. Dont just dunk your finger in.
  • Things can and will get messy.

Right in time for #ManicureMonday

‘Til next time,

xx Coy